- February 2, 2024
- Posted by: Anisha P, Akshaya G
- Categories: Analytics, Cloud Datawarehouse, Power BI, Snowflake
Introduction:
In the growing world of data analytics, integrating powerful cloud data warehouses like Snowflake with powerful visualization tools like Power BI is a game changer. This blog post walks you step-by-step through the process of connecting Snowflake to Power BI, allowing you to leverage the power of your data for reporting and analysis.
Connect to Snowflake data warehouses.
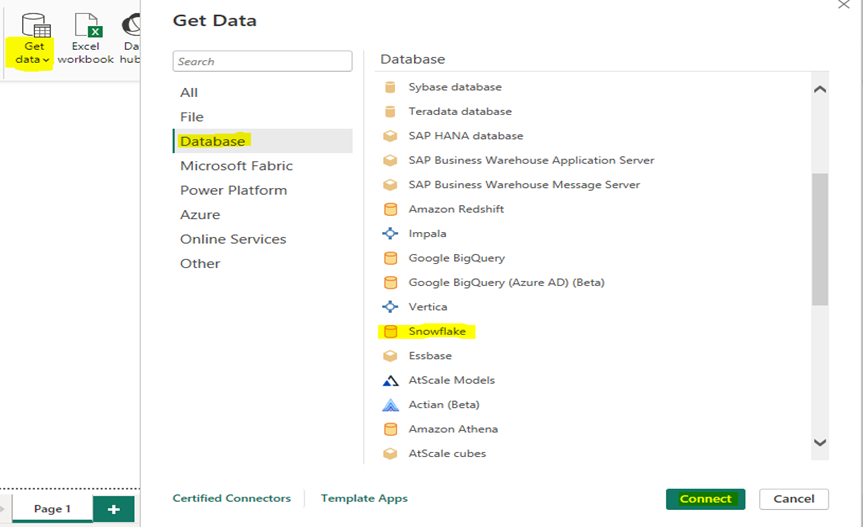
Step 1:
Click on Get Data from the Home, select Database from the categories on the left, select Snowflake, and then click Connect.
Step 2:
Enter the name of the computing warehouse and the Snowflake server in the Snowflake window that pops up.

Enter values, including role name, timeout, and database name, that you wish to use to change the connection query by expanding the Advanced Options. Additionally, the data can be retrieved from Snowflake using SQL commands. Select “Ok.”

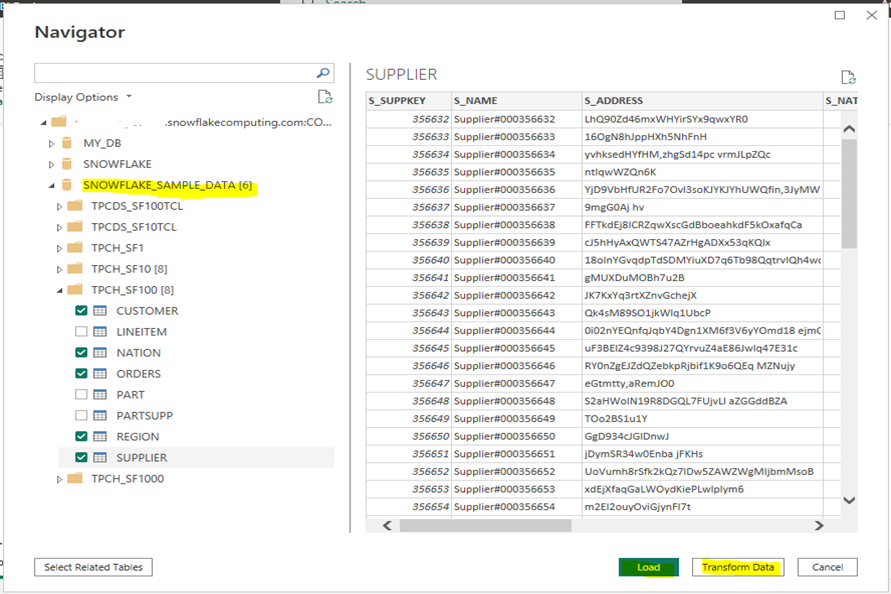
Step 3:
To sign in to your Snowflake computing warehouse, enter your username and password, and then click Connect.
Step 4:
Choose one or more tables to import and utilize in Power BI from Navigator. Next, choose Load to import the table into Power BI or Transform Data to launch the Power Query Editor. From there, you can tweak and filter the data set to utilize, and finally load it into Power BI Desktop.
Step 5:
Click OK after choosing Import or DirectQuery to import data straight into Power BI.

Step 6:
Data Model:
Establish relationship between the data model’s tables.
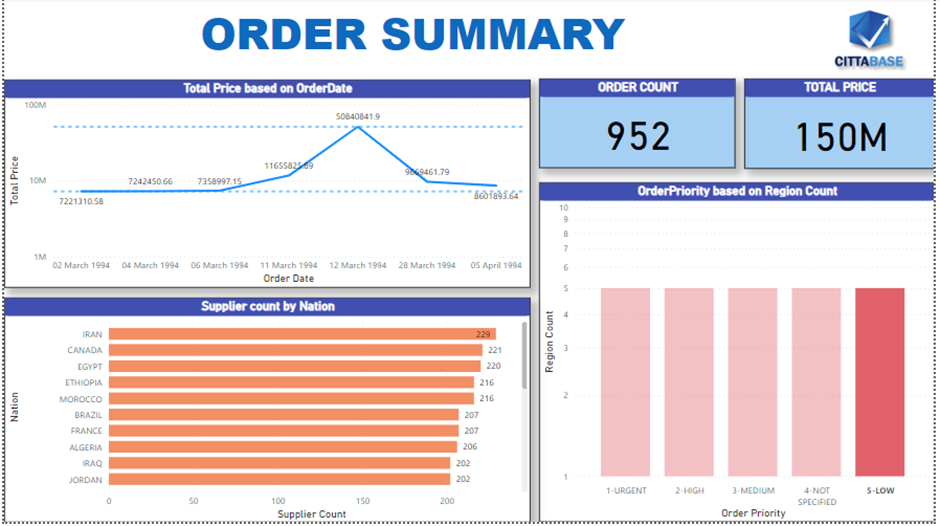
Create Reports:
Create visuals in accordance with the specifications. To build charts, tables, and other graphic elements, simply drag & drop fields onto the canvas.
Publish to Service:
You can access your Power BI file (.pbix) at https://app.powerbi.com after saving and publishing it to the Power BI Service.
After publishing, go to Semantic Model > Settings and enter the Snowflake credentials in Data Source Credentials > Edit credentials.

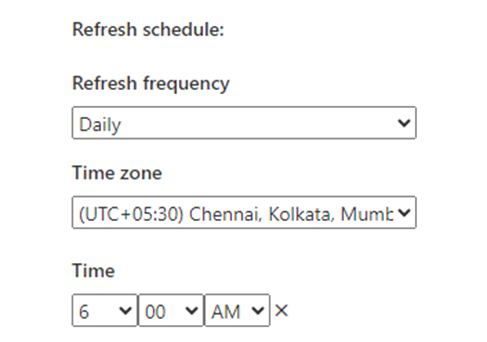
Scheduled Data Refresh:
Establish recurring data refreshes to ensure that the reports are current. Choose the right time by navigating to Scheduled refresh and performance optimization.
Data from the original data sources can be automatically refreshed by the Power BI Service.
Conclusion:
By following these steps, you’ll seamlessly connect Snowflake to Power BI, unlocking a powerful synergy between your cloud data warehouse and visualization tool.
Cittabase is a select partner with Snowflake. Please feel free to contact us regarding your Snowflake solution needs. Our snowflake solutions encompass a suite of services for your data integration and migration needs. We are committed to providing personalized assistance and support customized to your requirements.